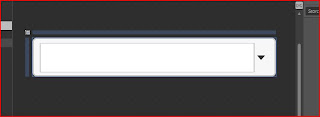
Today I will show you how to customize Silverlight’s ComboBox control. To follow along open up Visual Studio 2010 and/or Expression Blend 4 to begin. Create a new Silverlight Application, give it a name and press ok. The goal for this post is to customize the ComboBox to accept input from the user.
Now that you have your project set up, create a new UserControl and call it CustomComboBox. Drag a ComboBox onto the design view, set the width and height properties to your specific needs. I set the width to 191 and the height to 26. Resize the UserControl to fit the combobox width and height. So now my usercontrol and combobox have the same width and height values.
In Expression Blend right click on the combobox you just created, go to Edit template -> Edit Copy. In the Object and Timeline panel navigate to ContentPresenterBorder -> expand the Grid -> expand ContentPresenter.
Here we want to replace the ContentPresenter with a TextBox and add the bindings that was included with the ContentPresenter to the TextBox.
Here is the finally screen shot. Go Silverlight.


No comments:
Post a Comment